Easy and Delicious Homemade Yogurt

Our family is nuts about yogurt. Especially of the plain and simple variety. I’m not exactly sure how, but my kids  – who love sweets in every other context – continue to prefer their yogurt rich, creamy and unsweetened. This all means that we were going to through 3-4 32. oz tubs a week. Cost not withstanding, recycling that many yogurt containers began to feel incredibly wasteful. I tried creative reuse at first but one can only hold on to so many empties before they overtake the house. Even the preschool had politely declined donations. I knew it was time to get over my fear of culturing my own food and forge ahead toward homemade. With one caveat: the finish product had to taste just like our favorite Straus Family Creamery yogurt or else. Actually, two caveats: the kids would have to eat it without complaint.

With very little trial and error and a few months of practice, I’ve earned enough yogurt-making props from family and friends to officially go public with the technique. As you’ll see, the beneficial bacteria really do all of the work.

Continue reading

Low-Sugar Apricot Jam: Taking PB+J To Another Level

I caught the canning bug a few years ago and have completely fallen in love with homemade jam. Sure, artisanal options abound these days, but they are quite pricey for such small jars. Its so worth making your own, if for no other reason than to have complete control over fruit, flavor, and sugar content (I am a big fan of low-sugar jams). Your kids will appreciate how especially delicious their peanut butter sandwiches will taste, and that morning toast ritual will be worth lingering over for a few extra minutes. Canning also gives you another great reason to go to the farmers’ market and get to know your local producers. Quality fruit is always more affordable in bulk, so buy a flat or two, save some for the fruit bowl and can the rest.

Stash those jam jars in the cupboard and you’ll have the pleasure of tasting a bit of summer in the dead of winter. Use jam in obvious ways but also explore. Who knew jam and blue cheese worked so well together? Of course, these also make great (holiday) gifts.

Continue reading

Rainbow Cole Slaw with Sesame Dressing

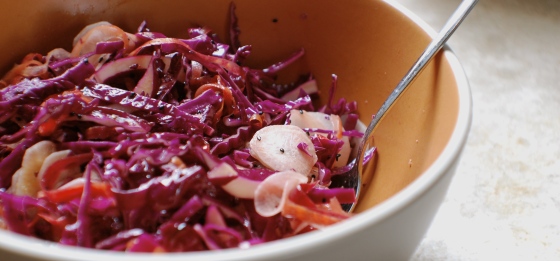
With the exception of a garlicky aioli accessorized by french fries, I am not a mayonnaise kind of girl. So when the cabbage shows up in the summer CSA box, cole slaw is not an option. At least not in the traditional sense. But over the years, this version, made delicious thanks to soy, sesame, and ginger flavors, is a standard go to.

This salad is an easy lunch or dinner side dish designed for the lives of busy families. You won’t regret having a large batch of this dressing on hand in the fridge, as it works just as well for a green salad as for this one. Pre-chop the vegetables a few hours in advance of pulling the salad together to make things go faster at mealtime. Or, mix it all up and let the cabbage soften and soak in the flavors of the dressing for a few hours. Pair with rice and potstickers or sautéed tofu and its a quick weeknight meal.

For maximum enjoyment, make this salad as colorful as you can. Rainbow carrots, green and purple cabbage, white diakon or turnips, black sesame seeds, dark green scallions. You get the picture.

PS Happy Birthday, Mom!

Continue reading

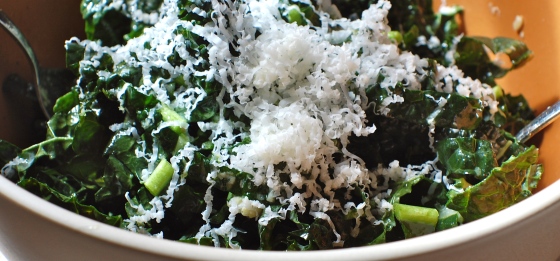
Me, Jacques and Kale Caesar Salad

I haven’t been myself in the kitchen lately. Or with food in general, really. No inspiration for cooking, no new ideas to spark our weekly routines, not even an appetite for eating. This is a sad state of affairs for a food lover like me to be in. Especially as the bounty of spring and summer approaches.

That all changed this week. Thankfully. During the past four days, I had the pleasure of spending an evening cooking and learning from the wonderful Tamar Adler, (whose new book is keeping me up at night, in a good way) AND attending a talk by my all-time culinary hero Jacques Pepin, whose KQED TV programs taught me so much about how to cook with precision, economy and love during my college years. A few new cookbooks that just arrived didn’t hurt either.

Me and Jacques, Saying Hello

I see the cook and eater in me re-emerging from the cocoon. This makes me very happy. And now, for a quick recipe to inspire your weekend cooking…. Continue reading

Winter Greens and Leek Frittata

With spring around the corner, I’ve been craving lighter foods but ones that still retain the heartiness of winter fare. This frittata is a wonderful option for this transitional time of year. Use the recipe as a base for any combination of vegetables. Little bits and mixtures are perfect.

The rule of thumb is to create a diversity of flavors and textures, adding herbs if you have any on hand, and a representative of the allium family (onion, leek, garlic, shallot, etc). I love how these humble ingredients are elevated to a far fancier status with the addition of eggs and a little milk. This frittata is super versatile – a full proof choice for any meal and a great option for a casual brunch. Make it the night before if that is easier, and warm gently before serving.

The recipe below features a winter combo. In spring, try gently cooked fava beans, English peas, scallions and chives. In summer, a mix of sautéed summer squashes and basil or cilantro will be delicious. The possibilities are endless. Now if only I could convince the kids to love this as much as I do…

Continue reading

Easy, Delicious From Scratch Beans (Yes). Bisphenol A (No).

I’ve wanted to do a post on beans for a while now, because they are such a wonderful healthy food that seems to appeal to even the pickiest of palettes. In our house, beans satisfy both the carnivore and the omnivores, and are a perfect hot school lunch option when paired with rice or polenta.

Over the past two years, I have slowly weaned our household away from canned foods. I came to this decision out of concern that canned foods are contaminated with a chemical called bisphenol-A (BPA for short). BPA is hormone disruptor that can interfere with normal development and function of the body. Recent tests by the Centers for Disease Control show that exposure is fairly ubiquitous, and human evidence of harm is emerging. Since canned foods are a primary source of exposure, and one that we generally have control over, reducing our family’s reliance on canned food seemed like a good strategy.

Figuring out how to efficiently make beans from scratch was key to this effort (that, and canning my own tomato sauce, which I’ll leave for another post). The great thing I discovered is that making beans at home is actually very easy; it inspires exploration of different bean varieties (we were stuck on pintos for years but tried heirloom black beans this summer that wowed us with their flavor and texture); and most importantly, it is far cheaper than canned.

The key to making this work? Don’t plan around a bean dinner to make beans. Make them anytime you’ll be around the house for at least an hour and have the capacity to stir a pot every so often. Or, better yet, rely on that slow cooker that may just be collecting dust in your small appliance cemetery. If you’ve got one, all you need is an outlet and a few hours of passive (ie no involvement from you) cooking time, no soaking required. Make lots of cooked beans and use some, then freeze the rest in small to mid-size containers. They defrost beautifully.

Stovetop Technique

Note: 1 cup of dry beans = about 3 cups cooked beans

Rinse and sort dried beans of your choice, discarding any blemished ones and stones/grit. Place in a medium-large pot and cover beans with cool water by about two inches. Soak overnight or for 8-10 hours. I usually set this up in the evening and if I don’t have time to cook the beans the following morning, I’ll place the soaked beans in the fridge until I carve out a more convenient cooking time.

Once the beans are soaked, it is time to cook. Start with a medium to large pot, depending on how many cups of beans you are preparing ( I would recommend at least 2 cups of dried beans to make it worth the time). Cover with three times their volume of fresh water. I like to add 1-2 tbsp. coarse sea salt to the cooking water, along with some aromatics.

Bay leaves, whole garlic cloves and onions are great options, especially for Mexican-style black and pinto beans. Bring beans to a rapid boil, then lower heat to a simmer and cook, partially covered, for 45 minutes to 1 hour. Check occasionally to be sure there is enough cooking water. You’ll know the beans are done when they are cooked through but not falling apart.

See below for use/storage info.

Slow Cooker Technique

This is my favorite method because no soaking is required! Wash your beans thoroughly, and place into slow cooker. Cover beans by about an inch of water, a little more is fine too. Add 1-2 tbsp. coarse sea salt. If using a fine salt, use less. You can always add more salt later but you don’t want to overdo it. Toss in the aromatics of your choice (see above) and cover. Set the timer for 3 hours. If you are home, check the slow cooker to be sure the beans are covered with enough water. If they begin to look dry, add some more. They should be ready in 3-4 hours depending on the beans.

Storage and Use

I recommend holding on to a least a can’s worth (a 14 oz. can of beans is about 1 ½ cups) in the fridge for school lunches; to serve alongside quesadillas for a quick lunch or dinner; to accompany chicken tacos; to sprinkle with nutritional yeast for a quick snack; and to make into proper vegetarian dishes of various sorts. The possibilities are endless.

Freeze the rest, and be sure to cover the beans with cooking water when freezing them. Now you have beans at your disposal anytime, after a quick defrost.

Final note: For those of you who eat beans frequently, a pressure-cooker may be a useful tool. I had to put the kibosh on further appliance purchases for our household but my vegetarian friends swear by it. Unsoaked beans can be cooked in a pressure cooker in 20-45 minutes, depending on the variety.


Surviving Back to School Step 1: A Family Meal Calendar

While it has been great fun posting about my baking endeavors and lazy summer meals, reality struck with a vengeance right around last Monday! This happened to be the first day of third grade for Ava, as well as the last day of “lazy” camp mornings for us. Despite my best intentions for the opposite, I found myself totally unprepared, perhaps because I haven’t yet adjusted to having to function at full throttle in the middle of August. Which to most people outside of San Francisco is considered the height of summer.

By morning #3, it was apparent that our usual patterns we’re failing. The “what do you want for breakfast today?” under duress left us frantic (duress in this case equals having to be out the door by 7:40 at the latest to make it to school on time) . Lunch went great for a few days, then we became the recipients of the nearly full lunch bag and “hangry” late afternoon tantrums.

Given all of this, I came up with a new approach that will hopefully set us on the right track: a food calendar. In its simplest version, it looks like this:

The plan was to pick a consistent breakfast idea for every Monday, Tuesday, etc of each week, so that everyone was on board in terms of cooking and eating expectations.  And while we were busy planning breakfasts, why not plan lunches too? It also seemed like an excellent way to engage the kids in the food planning process so that when they complained (as they surely will) about having oatmeal on Tuesday, for example, we would be prepared to remind them – gently and with the utmost patience of course  –  that it was their choice in the first place. I expect that monthly revisions at the outset, but that will still be a great improvement over daily scrambling (and I don’t mean eggs).

Witness the completed plan. We are very proud.

Summer Squash Linguine with Cheese

We returned from a wonderful vacation a few days ago, and I’m finding myself very happy to be home and cooking again! Not that we didn’t have an amazing time exploring the various treasures of British Columbia but after a long stretch of restaurant meals, I crave the simplicity of home-cooked food. This post was set up the week, assuming there would be time to finalize it and share while away but as with so many things, you live and learn. Everything about my daily life – even this blog – felt very distant as we explored gorgeous Salt Spring Island and dabbled in city travel with two little ones (the former is far easier).

And now, onto important matters, like: zucchini candy. Yes, zucchini candy. This phrase was coined by yours truly last summer after years of frustration trying to get the girls to willingly eat summer squash. After all, it is a quintessential summer vegetable.  It not just withstands, but thrives, in the harsh conditions of our little backyard plot. It is surprisingly versatile. And it happens to show up in droves in the CSA box, which means I am often on point to come up with creative strategies for preparing it.

Of course zucchini muffins go down easy, but not so the savory options. I tried the soup approach (which is incredibly delicious and simple – will post on this later). No love. I tried the simple saute with mushrooms. Lukewarm. Then, I hit the magic bullet: we grew our own. Suddenly, there was real pride involved in harvesting, which then leads to a greater willingness to eat the spoils. The outcome of  a quick saute on high heat with garlic and olive oil became “zucchini candy”. We struck gold. As long as it was served as a side dish, it disappeared alongside smiling faces.

So this summer’s test was to see whether I could incorporate it into a main course with any success. Since I’ve been personally obsessed with linguine for the past few weeks (on account of a transcendent version with anchovies and spicy peppers I had at Locanda recently), I decided to give a simple summer pasta dish a try. To my total surprise, they went for it hook, line and sinker. It seems as though a new quick, simple and delicious dinner (or lunch) is born!

Preparation

Total time: 30 minutes

Serves: 4-6 or more  (easily scaled to the number of people you are serving)

  1. Working with a ratio of about 1-1 1/2 pounds of summer squash per 4 servings, cut squash in half, then slice into thin half circles. Thinly slice 4-5 garlic cloves. Chop a few handfuls of fresh sage if you have on hand (or parsley, oregano, tarragon, whatever you favor).
  2. In the meantime, bring a large pot of water to boil for the linguine (or other pasta, per your preference) and cook according to package instructions or until al dente, remembering to generously salt the water before adding pasta. Be sure to reserve about a cup of cooked pasta water before draining the noodles.
  3. Warm a few tablespoons of olive oil in a large pan and saute the squash over high heat, stirring often so it doesn’t stick or burn, about 10 minutes. It should be caramelized (brown) and soft, a darker in color and sweet to taste when ready. When you think the squash is almost ready, add the garlic slices and cook for a minute or so, until fragrant but not brown.  This would be a great time to add a dash or two of chile flakes (adding them later, upon serving works too).
  4. If you are using fresh herbs – besides sage – add them to the squash-garlic mixture in the last 5 minutes of cooking. If you are using sage, fry them in warm olive oil in a separate small pan and reserve as a garnish. This is totally optional.
  5. If your pan is large enough to hold the zucchini mix and all of the pasta, add the drained pasta and a bit of the cooking water to the pan. Toss to distribute the vegetables throughout the pasta. If you – like me – don’t have room to mix everything in one pan, create a saucier vegetable mix by adding about 1/2 cup (or more if dry) pasta water to the squash mix and cooking for a minute or two, making sure to scrape the delicious caramelized bits on the bottom of the pan.
  6. Drizzle lemon juice, to taste, on the pasta and serve with grated Parmesan cheese  (Asiago, Gruyere or another hard cheese would work great too) and a salad on the side. Don’t forget to sprinkle the fried sage on top if you made some.

Turkish Dinner Part 1: Summer Lentil Soup with Lemon

I woke up the other morning feeling like soup. A light, summery soup, but not a cold one. Not yet. Temperatures were barely grazing 70  so I decided to wait for a real heat wave before bringing out the gazpachos and cold yogurt soups.

Jonah and I honeymooned in Turkey this time of year about ten years ago, and absolutely fell in love with their classic red lentil soup, known as Mercimek Çorbasi. It is beyond humble in terms of ingredients yet the squeeze of lemon and dash of sumac and cilantro at the finish results in something delicious and satisfying either as a light meal or a first course.

Soup preparation also sparked some last-minute inspiration, which I always appreciate, especially on a Wednesday. I spied a pound of ground lamb hanging around the freezer, and turned the simple soup dinner into “Turkish Night.” The ground meat became lamb burger sliders, which we served in toasted pita, drizzled with yogurt sauce. I’ll share those recipes in a separate post – they were amazing. According to Ava, so amazing that the dinner “could be served in a buffet.” There is no higher form of compliment.

PS I just realized I’ve been on a lentils kick. This will pass soon. I promise.

Preparation

Adapted from the New York Times

Serves 4-6

Prep time: 5-10 minutes; total time: 40 minutes

In a large pot, heat 3 tablespoons olive oil over high heat until hot and shimmering. Add 1 large chopped onion and 3-4 minced garlic cloves, and sauté until soft, about 4 minutes.

Stir in 1 tbsp. tomato paste, 1 tsp. ground cumin, 1/4 tsp. each kosher salt and black pepper and a pinch of chili powder or cayenne (yes – even for a family meal. It won’t be spicy, I promise!). Sauté for 2 minutes longer.

Add 1 quart of chicken/vegetable broth and 2 cups water (or 6 cups of water) to onion-spice mixture along with 1 cup of red lentils and 2 diced carrots. Bring to a gentle boil, then partially cover pot and turn heat to medium-low. Simmer until lentils are soft, about 30 minutes. Taste and add salt if necessary.

Cool soup a bit, then purée half the soup using an immersion or regular blender or a food processor. Add pureed soup back to pot. The soup should have some texture.

Reheat soup if necessary, then stir in juice from 1/2 to one lemon (to taste). Garnish with fresh chopped cilantro, a sprinkle of sumac if you have it on hand and a drizzle of olive oil.  You can also dust it lightly with chili powder if desired.

Lentil Salad with Spring Vegetables and Goat Cheese

I’m addicted to grain/legume salads these days (see here, plus there will be more to come). Easy to whip up, a great way to use miscellaneous vegetables languishing and neglected in the crisper drawer, perfect for warm summer weather (which will come to SF at some point, right?). What’s not to like? In terms of a family dinner, this falls into the questionable category – dishes that I offer many times before they become a hit.  I’ll ask the girls to try a few bites of the regular version, but likely keep on hand the various ingredients in their separated form in case the “yuck” factor strikes. Aim for color with the vegetable mix and also crunch. Eventually they’ll come around. I hope!

Preparation

Serves 4-6

Mix 2-2.5 cups of cooked lentils*** (french or beluga lentils would be best here, or a mix) with 1-2 cups of mixed chopped vegetables. In my version, I used cooked fava beans, sliced cheery tomatoes, chopped hearts of palm for a tangy contrast, radishes, carrots, a few turnips. English or sugar snap peas would also be perfect additions, as would fresh corn, cucumber, bell peppers, etc. Add a combination of chopped herbs you have some on hand: parsley, cilantro, mint and tarragon would be great choices.s Toss with lemon juice or your favorite vinegar, olive oil, salt, and pepper. If desired, add crumbled goat cheese, feta or Mexican cotija cheese.

Dressing please!

Version without cheese ready to serve

*** I tend to rely on Trader Joe’s prepared lentils to make this salad extra easy. If you don’t have access to this product, make your own:

Cooked Lentils

Place about 1 pound of french lentils to a large pot of water. Pierce a small onion with a few whole cloves (optional) and add it to the lentils, along with 3 dried bay leaves, and one large diced carrot. Cover by at least 2 inches of water. Bring to boil, cover and simmer for about 20-30 minutes, until lentil are soft but intact. Add more water if needed. Season with salt and pepper and drain.