Rainbow Cole Slaw with Sesame Dressing

With the exception of a garlicky aioli accessorized by french fries, I am not a mayonnaise kind of girl. So when the cabbage shows up in the summer CSA box, cole slaw is not an option. At least not in the traditional sense. But over the years, this version, made delicious thanks to soy, sesame, and ginger flavors, is a standard go to.

This salad is an easy lunch or dinner side dish designed for the lives of busy families. You won’t regret having a large batch of this dressing on hand in the fridge, as it works just as well for a green salad as for this one. Pre-chop the vegetables a few hours in advance of pulling the salad together to make things go faster at mealtime. Or, mix it all up and let the cabbage soften and soak in the flavors of the dressing for a few hours. Pair with rice and potstickers or sautéed tofu and its a quick weeknight meal.

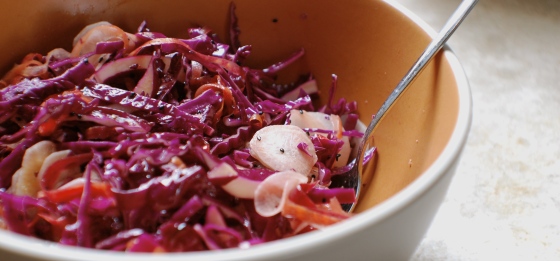
For maximum enjoyment, make this salad as colorful as you can. Rainbow carrots, green and purple cabbage, white diakon or turnips, black sesame seeds, dark green scallions. You get the picture.

PS Happy Birthday, Mom!

Continue reading

Quick Tip of the Week: Sweet Potato Fries Discovery

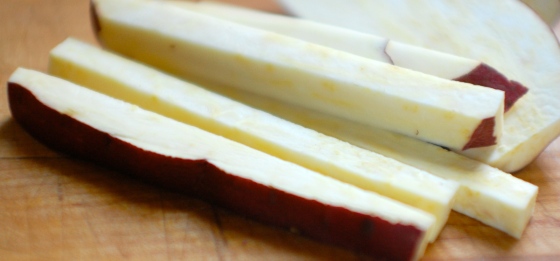
I accidentally bought a couple of Japanese sweet potatoes last week, along with the usual garnet yams, with sweet potato fries in mind. You know the Japanese ones – they are light yellow on the inside, darker purple on the outside and most commonly found breaded with tempura alongside sushi.

Of course I threw them into the mix, assuming it couldn’t hurt. It didn’t. In fact, I discovered that Japanese sweet potatoes are perfect for this preparation. Because of their higher starch content, they hold up better than regular sweet potatoes/yams (this reminds me to again research the difference between the two) and have a stronger resemblance to thick-cut french fries. They are also a bit less sweet, which I prefer.

Give it a try! General directions for sweet potato fries are found here. Once they are tossed in olive/peanut/safflower/grapeseed oil, salt and pepper, a quick 15-20 roast minute roast in a 425° oven is all it takes. End result? Happy, goofy kids:

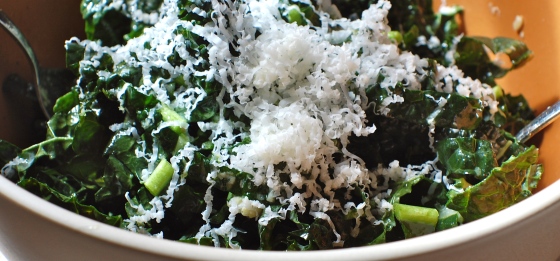
Me, Jacques and Kale Caesar Salad

I haven’t been myself in the kitchen lately. Or with food in general, really. No inspiration for cooking, no new ideas to spark our weekly routines, not even an appetite for eating. This is a sad state of affairs for a food lover like me to be in. Especially as the bounty of spring and summer approaches.

That all changed this week. Thankfully. During the past four days, I had the pleasure of spending an evening cooking and learning from the wonderful Tamar Adler, (whose new book is keeping me up at night, in a good way) AND attending a talk by my all-time culinary hero Jacques Pepin, whose KQED TV programs taught me so much about how to cook with precision, economy and love during my college years. A few new cookbooks that just arrived didn’t hurt either.

Me and Jacques, Saying Hello

I see the cook and eater in me re-emerging from the cocoon. This makes me very happy. And now, for a quick recipe to inspire your weekend cooking…. Continue reading

Maple-Glazed Brussels Sprouts

When it comes to Brussels sprouts, I’m generally a purist: savory, with olive oil, salt, high heat, maybe some pancetta if it’s on hand and the mood strikes. So you can imagine my reaction the other week when my lovely mother-in-law suggested steaming them, then tossing with maple syrup. I couldn’t go there, but I agreed to split the difference. We went with my usual method but added in the dash of maple toward the end to glaze them. I will be the first to admit that my skepticism went out the window. This is a new family favorite, and with the sweetness, may even entice a reluctant “sprout” to partake.

Continue reading

Roasted Cauliflower with Capers and Anchovies

Yes, that says anchovies. Don’t stop reading! They are the “secret ingredient” in this dish, one that elevates something very simple to another level. But more on that in a minute.

Cold weather began in earnest about a week ago, and my trusty oven has been operating in full force ever since. Roasting is my cooking process of choice this time of year, especially on rushed weekday evenings. Part of the attraction is that its relatively passive, leaving hands and minds free for dealing with stovetop cooking, squeaky kids, and other urgent matters. The other great benefit of roasting is that it can transform even the most humble vegetable – cauliflower a perfect case in point – into something sweeter, more flavorful, and tender.

This recipe is one of our family’s favorite cauliflower preparations. The girls love olives and capers (anything pickled actually) so I always overload one or the other into the roasting pan. The anchovies completely disappear in the roasting process, leaving behind tons of tangy flavor, nothing fishy. Throw in garlic too if you like. My goal is to also integrate dried chilies in the future, but I’m not sure how Talia will feel about that. This also makes for an excellent and easy Thanksgiving side dish.

Now if only I could rig a way to remotely preheat the oven so its ready exactly when I need it….

Preparation

Prep time: 10 minutes

Total time: 40-50 minutes, depending on oven

Serves 4-6

Preheat oven to 425°.

Starting with two medium-sized cauliflower heads (preferably a mix of white, orange and/or purple), wash and cut the florets into bite-sized pieces. Spin or toss to dry a bit, then place into a roasting pan of choice. One hint here: in my oven, it will certainly take longer to cook this dish in a ceramic pan, as opposed to a baking sheet with parchment paper. So opt for the latter if you are in a rush.

Toss cauliflower pieces with a generous amount of olive oil, 1-3 tbsp. rinsed capers (amount based on personal preference), a head of garlic with the cloves separated (optional), a small handful of crumpled, dried chilies (optional), and 4-6 anchovy fillets torn into small bits.

Season generously with pepper before putting it in the oven but hold off on the salt until the vegetables are done. The anchovies inherently add a lot of salt.

Roast for 30-40 minutes, until caramelized and tender to the bite.

Ready for roasting!

Done, at last!

If you're feeling purple...

Note: If you prefer faster cooking time in exchange for a little more clean up, steam the cauliflower florets until they are just tender. This will cut the roasting time by at least 10 minutes if not longer (oven dependent).

Easy, Delicious From Scratch Beans (Yes). Bisphenol A (No).

I’ve wanted to do a post on beans for a while now, because they are such a wonderful healthy food that seems to appeal to even the pickiest of palettes. In our house, beans satisfy both the carnivore and the omnivores, and are a perfect hot school lunch option when paired with rice or polenta.

Over the past two years, I have slowly weaned our household away from canned foods. I came to this decision out of concern that canned foods are contaminated with a chemical called bisphenol-A (BPA for short). BPA is hormone disruptor that can interfere with normal development and function of the body. Recent tests by the Centers for Disease Control show that exposure is fairly ubiquitous, and human evidence of harm is emerging. Since canned foods are a primary source of exposure, and one that we generally have control over, reducing our family’s reliance on canned food seemed like a good strategy.

Figuring out how to efficiently make beans from scratch was key to this effort (that, and canning my own tomato sauce, which I’ll leave for another post). The great thing I discovered is that making beans at home is actually very easy; it inspires exploration of different bean varieties (we were stuck on pintos for years but tried heirloom black beans this summer that wowed us with their flavor and texture); and most importantly, it is far cheaper than canned.

The key to making this work? Don’t plan around a bean dinner to make beans. Make them anytime you’ll be around the house for at least an hour and have the capacity to stir a pot every so often. Or, better yet, rely on that slow cooker that may just be collecting dust in your small appliance cemetery. If you’ve got one, all you need is an outlet and a few hours of passive (ie no involvement from you) cooking time, no soaking required. Make lots of cooked beans and use some, then freeze the rest in small to mid-size containers. They defrost beautifully.

Stovetop Technique

Note: 1 cup of dry beans = about 3 cups cooked beans

Rinse and sort dried beans of your choice, discarding any blemished ones and stones/grit. Place in a medium-large pot and cover beans with cool water by about two inches. Soak overnight or for 8-10 hours. I usually set this up in the evening and if I don’t have time to cook the beans the following morning, I’ll place the soaked beans in the fridge until I carve out a more convenient cooking time.

Once the beans are soaked, it is time to cook. Start with a medium to large pot, depending on how many cups of beans you are preparing ( I would recommend at least 2 cups of dried beans to make it worth the time). Cover with three times their volume of fresh water. I like to add 1-2 tbsp. coarse sea salt to the cooking water, along with some aromatics.

Bay leaves, whole garlic cloves and onions are great options, especially for Mexican-style black and pinto beans. Bring beans to a rapid boil, then lower heat to a simmer and cook, partially covered, for 45 minutes to 1 hour. Check occasionally to be sure there is enough cooking water. You’ll know the beans are done when they are cooked through but not falling apart.

See below for use/storage info.

Slow Cooker Technique

This is my favorite method because no soaking is required! Wash your beans thoroughly, and place into slow cooker. Cover beans by about an inch of water, a little more is fine too. Add 1-2 tbsp. coarse sea salt. If using a fine salt, use less. You can always add more salt later but you don’t want to overdo it. Toss in the aromatics of your choice (see above) and cover. Set the timer for 3 hours. If you are home, check the slow cooker to be sure the beans are covered with enough water. If they begin to look dry, add some more. They should be ready in 3-4 hours depending on the beans.

Storage and Use

I recommend holding on to a least a can’s worth (a 14 oz. can of beans is about 1 ½ cups) in the fridge for school lunches; to serve alongside quesadillas for a quick lunch or dinner; to accompany chicken tacos; to sprinkle with nutritional yeast for a quick snack; and to make into proper vegetarian dishes of various sorts. The possibilities are endless.

Freeze the rest, and be sure to cover the beans with cooking water when freezing them. Now you have beans at your disposal anytime, after a quick defrost.

Final note: For those of you who eat beans frequently, a pressure-cooker may be a useful tool. I had to put the kibosh on further appliance purchases for our household but my vegetarian friends swear by it. Unsoaked beans can be cooked in a pressure cooker in 20-45 minutes, depending on the variety.

Warmed Fresh Corn with Cilantro

I’m staring out my window at the pouring late June rain (an entirely bizarre weather pattern for San Francisco) and can’t believe that just two days ago I was enjoying this very summery side dish.

The girls and I had arrived home from warm and sunny Southern California on Sunday evening. The plane landed early, with what felt like plenty of time to whip up a quick dinner (due in large part to the well-stocked fridge my awesome husband left behind). We decided on cheese and mushroom pizza as the main course. One look at the bursting crisper drawers made me want to scrap veggies altogether, until the two beautiful ears of corn caught my eye.

Rather than boil or grill (no time for either), I decided to make a pared down version of a classic summer combo in our house, chopped zucchini, corn, onions and herbs. It was a lovely way to welcome our first summer 2011 corn.

As an aside, I heard an NPR interview over the weekend with star London chef Yotam Ottolenghi, speaking about his new vegetable-oriented cookbook “Plenty.” He totally won me over with his simple yet sophisticated approach to vegetables (not to mention his sexy voice!). Apparently, his secret to home cooking is the liberal use of herbs, which have the magic ability to make even the most humble foods shine. The cookbook is in the mail!

Preparation

Serves 4

With a sharp knife, cut kernels from two corn cobs. This is best done over a bowl since the corn tends to fly in every direction.

Finely chop several handfuls of cilantro (or another fresh herb of choice). You want to end up with 2-3 tablespoons of herbs.

Melt butter (to taste) over medium heat in a pan. Add corn, chopped cilantro, several pinches of salt and a few dashes of pepper to the mixture. Sauté for about 5 minutes, depending on how crunchy or soft you prefer the corn.

Kale Chips

On my quick farmers’ market run yesterday afternoon, I spotted kale chips selling for $5 per small bag. Which got me thinking…. raw kale goes for about $1.50 a bunch this time of year. And while the packaged version was quite a fancy food product, mixed with a vegan cheese and apparently shelf-stable, homemade kale chips sure are a delicious and seriously guilt-free addiction. Provided you don’t eat too many in one sitting, as I have certainly known to do!

Preparation

Serves 4-5
 

Preheat oven to 350°

Remove kale (I prefer to use dino/lacinato kale but others work just as well) leaves from stems: I find the easiest technique for this is to fold the kale in half lengthwise, and cut along the center stem. One cut should remove leaves on both sides.

Rinse well and dry. Tear or cut the kale into chip or bite-sized pieces. Toss well with (extra virgin) olive oil and (sea) salt. Transfer to a lined baking sheet and bake for about 10-15 minutes, taking care not to burn the edges.

Add further seasonings of your choice – chili powder and lime comes to mind. Substituting tamari soy for sea salt is delicious, especially with a sesame oil and sesame seed combo.

Enjoy immediately as a snack or side dish – but remember, pace yourself!

Vegetable and Whole Grain Salad with Preserved Lemons

My cousin introduced me to preserved lemons over bagels and lox earlier this year, and I came home from that visit totally hooked. I immediately picked a few up at the store, but my enthusiasm waned when I realized I wasn’t quite sure what to do with them. Luckily, my brilliant husband  suggested tossing them into a wonderful grain salad that we make as a vehicle to use up miscellaneous vegetables we have on hand. A citrus and olive oil dressing is all it needs – with a little harissa (Moroccan chili paste) to spike it if you love a spicier flavor like we do. I will say that I had no expectations of the girls enjoying this, and they didn’t even try it the first five times it appeared on the table. But the last time, without any prompting, curiosity got the best of them. They both tried a quinoa version, with favorable, if not exactly glowing, reviews.

Preparation

Preserved lemons can be found at most specialty stores and Middle Eastern markets. But they are also very easy to make at home (which is what I decided to do after using up the store-bought ones). They take about a month to cure in a dark pantry, then last for a long time in the fridge. David Lebovitz’s recipe is a good reference:

http://www.davidlebovitz.com/2006/12/moroccan-preser-1/

Before

After!

Salad (serve 4-6 as a side dish)

Combine 2-3 cups or more of cooked quinoa (I love to combine the red and white varieties), farro, brown rice or another whole grain of choice with a mix of raw or gently cooked vegetables. In version pictured above, we lightly sautéed radicchio (any chicory adds wonderful flavor contrast). Red cabbage and carrots works great. As would arugula, small broccoli pieces, sautéed zucchini in summertime, etc. Chop the rind of preserved lemon into small pieces and add to salad. If you have fresh herbs on hand, throw those in too. Cilantro, parsley, mint and tarragon would all be good options. Toss with a light citrus dressing, salt and pepper and serve. This works great for a meal anytime of the year, and for picnics too, which are on my mind as we slowly inch our way toward warmer weather.